I am done with gasoline and I’m never going back. Early last year, I sold my gasoline-powered car and went all in on an electric vehicle. I skipped right over hybrids, which I viewed as being burdened with the additional complexity of having to haul around two sources of locomotion. I figured that if I was going to try something new, I should just make the switch and not try to hedge against the new thing at the cost of added complexity and maintenance. Electric vehicles are well enough established (particularly in California) that there was little reason to avoid making the jump, and I’m so glad I made the switch.
After checking out everything from the large F-150 Lightning down to a petite little Chevy Bolt, I settled on a used 2022 Volkswagen ID.4 which had just come off lease. With only about 20,000 miles on the odometer, it was still very much like new. But the fact that it was previously a lease meant it was likely handled carefully, and the fact that it was now used meant it was extremely affordable for an EV at a time when EVs are often more expensive than gas vehicles. I ended up paying about $25,000 for it, and that felt like a steal for what I got.
This being my first EV, I was initially a little bit wary about going electric, but now that I have a year’s worth of daily-driver experience with the technology, it’s so crystal clear to me that this is the future of vehicles and that the internal combustion engine’s best days are behind it. It feels like a seismic shift both in the way I drive and use energy.
Like most EVs, the ID.4 has some really great features. The very first difference you notice is the instant acceleration. You start moving the moment you press the pedal. The best way to describe it is like the difference between pre-iPhone touchscreens which often struggled to keep up with the movement of your finger, whereas the iPhone made the screen contents feel like they moved directly with your finger. EV acceleration feels tactile and direct, rather than propagated through a buffer delay. Because it’s electric, the ID.4 moves so smoothly and quietly that it really feels like a much more expensive luxury car. It also has a tight turning radius and can thus easily achieve a 180 degree turn-around inside the width of a narrow street without having to perform a multi-point turn.
I was coming from a 2009 Toyota Corolla base trim, so many of the features of the ID.4 are just the current state of vehicles made within the last decade and not EV exclusives, but are nonetheless delightful to have, including:
- Illuminated exterior and (RGB) interior handles
- Comfortable heated seats
- Heated steering wheel
- Remote climate control
- Back up camera
- Side mirror lane occupancy indicators
- Built-in USB-C ports
- Apple CarPlay
CarPlay, in particular, was a must-have. The Chevy dealer tried to convince me that GM’s Bluetooth solution was still very good, but I wasn’t having that at all. The ID.4 also has walk-up unlock, walk-away lock, and auto-enters Park, so I never really think about what mode the car is in: I walk up (it unlocks), I get in, buckle, drive somewhere, stop, unbuckle (it enters Park), then I just get out and walk away (it locks). I never have to think about turning it on or off myself, making for a frictionless experience.
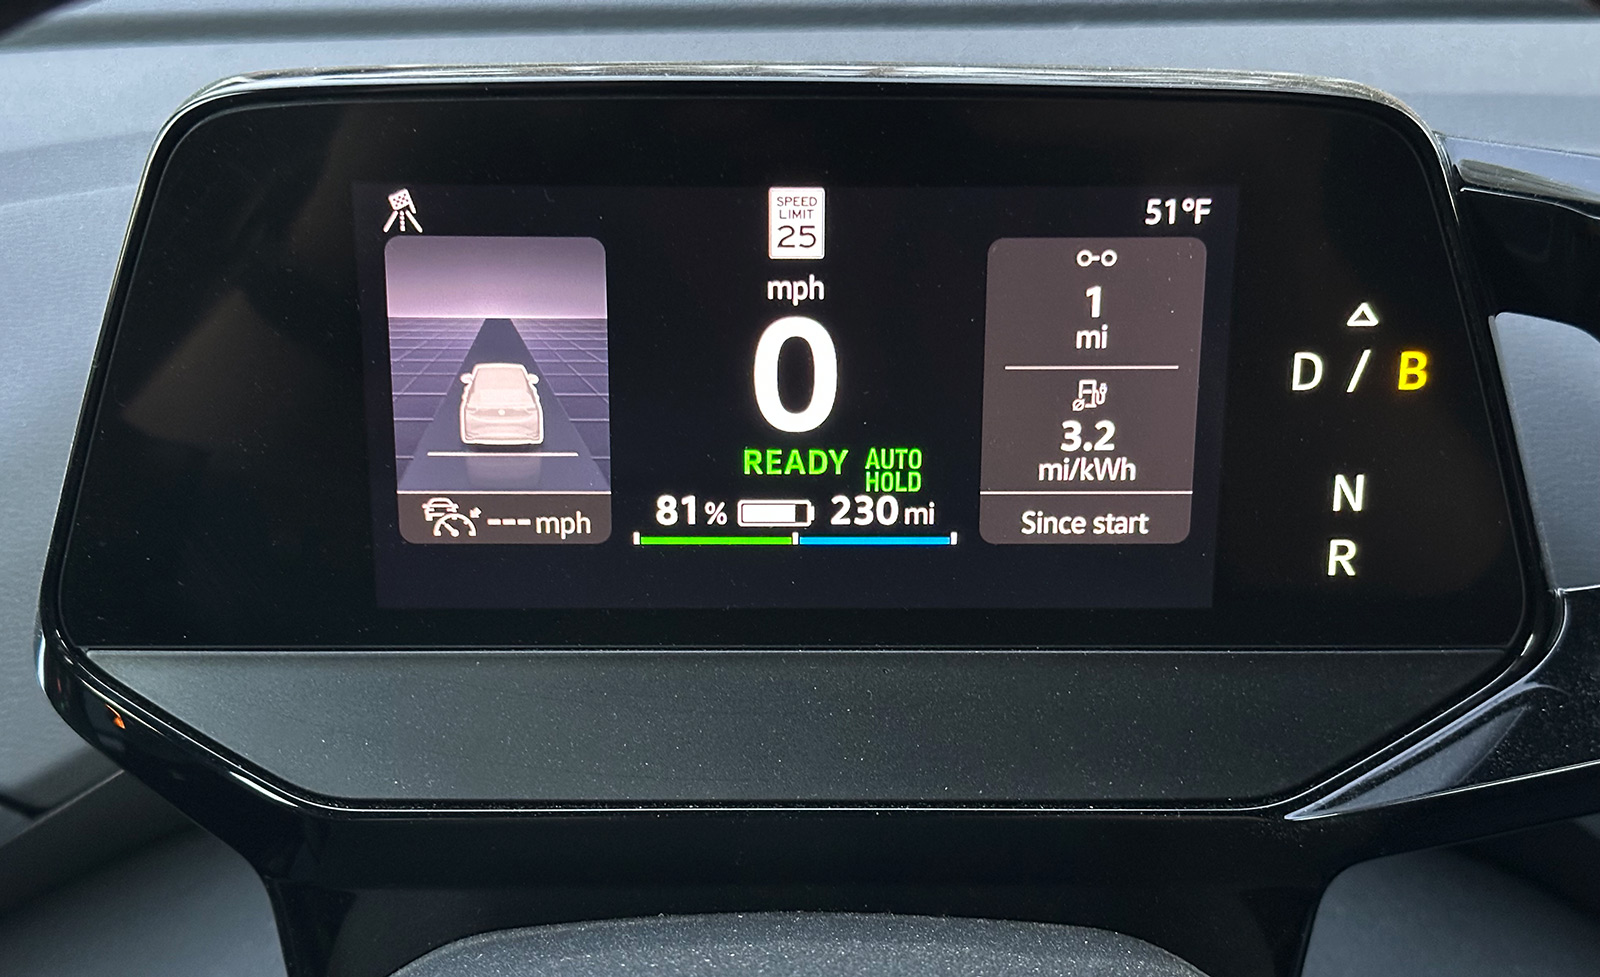
The ID.4 has two drive modes, “D” and “B”. D mode (the default Drive mode) makes the car drive much more like gas car, with the ability to coast for longer distances and do little regenerative braking. But toggle into B mode and the car behaves more like its true EV self, doing more aggressive regenerative braking when you ease off the accelerator pedal, allowing you to recover some electricity while cornering or going downhill. It took a short few days before B mode was far and away my preferred mode, making the D mode (and thus the behavior of gas cars) feel almost slippery by comparison.
The major consideration when choosing an EV is how and when you’ll charge the battery. Chargers are popping up in more and more places, but you very likely spend a lot of time not driving with the car parked somewhere for hours at a time. That’s probably the best time and place to charge. A couple years ago, we installed a modest home solar and battery storage system, and adding a home EV charger (Level 2 @ 220V 40A) charger later was a straightforward addition. While I could have achieved sufficient charging without any special charger using a regular household plug (Level 1 @ 110V 15-20A), the Level 2 home charger makes filling up my car only take a few hours and is easily done while I’m sleeping or working from home while the sun is shining on the solar panels. Powering my car is now effectively free using energy from the sun instead of disposable energy from oil. I can plug in at convenient times and almost always have a “full tank” ready to go without having to consider the gas station on the way home since my home is the station. And so is my work. And the grocery store. Almost every destination has something available or nearby, but having a sufficient charger at home is what really puts “range anxiety” fears to rest.
On the interior, one of the compelling reasons for choosing the ID.4 was its minimalist, unadorned heads-up display. The dashboard user interface is big, bright, and clear, with simple numerals for the speed, flanked by cruise control and next-turn instructions (which can use the built-in navigation or CarPlay). This approach was not true for the Kia Niro, which had a fake analog speedometer needle and gradients and shadows abound.
There are a few things that could be better, though:
- The steering wheel and center console use touch controls, and while they’re not easy to press accidentally, they do require you to look away from the road to adjust. In my Corolla, I could adjust the heat mode, fan speed, and temperature by feel alone, and that felt safer. VW is, thankfully, moving away from touch controls in future models.
- Remote climate control sometimes takes a minute or more to respond. I never had this feature at all before, though, so any availability was still a welcome feature.
- Wireless CarPlay is convenient, but a little laggy and skips occasionally. This might just be wireless CarPlay’s fault and not VW’s. Wired CarPlay via USB-C works reliably, is very responsive, and charges my phone faster than the available Qi charger (and with less heat).
- I wish the VW app had a web app counterpart. How hard could this be, given they already have an app?
Minor gripes aside, none of these are dealbreakers. Overall, the ID.4 is a competitively priced EV that was, for me, a great entry into the world of electric vehicles. My experience so far has been extremely positive, and if it were totaled, I would buy one again in a heartbeat. I’m never buying a gasoline-powered anything again.