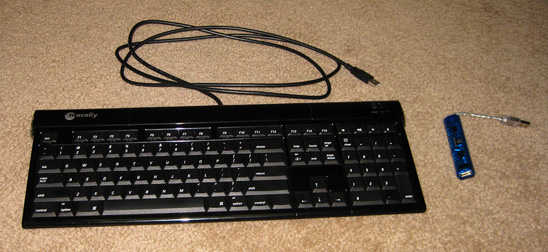
MacAlly IceKey USB 2.0
MacAlly has been producing the same IceKey keyboard since 2003, and while it’s a solid performer featuring comfortable low profile scissor keys and extra USB ports, it still ships with a maddeningly slow internal USB 1.1 hub. While this early USB specification is plenty fast for a keyboard alone, it throttles back speeds of all attached devices like flash drives, iPods, and digital cameras. Copying an music album or two can take several minutes over USB 1.1, whereas today’s USB 2.0 takes only seconds. With USB 2.0 as today’s ubiquitous standard and USB 3.0 just around the corner, it’s disappointing that MacAlly has yet to update the IceKey to include a faster hub. Luckily, you can take matters into your own hands. Here’s how to install a high speed hub inside the keyboard while maintaining MacAlly’s elegant factory appearance.
What You’ll Need
- a MacAlly IceKey
- a small, narrow USB hub (a cheap Targus hub worked fine for me)
- a screwdriver set
- a soldering iron, solder, and spare wire
- a pocket knife (I’m not sure any project I’ve done didn’t require this…)
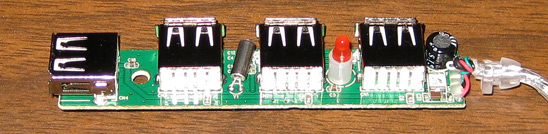
Open the Hub
USB hubs generally aren’t too complicated to open, and this Targus on is no exception. A single screw on the underside holds together the hub’s two plastic halves, which snap apart with little effort. Write a note or take a picture to document the wire colors and order relevant to the orientation of the board inside – it will come in handy later.
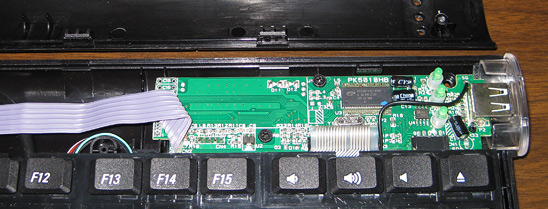
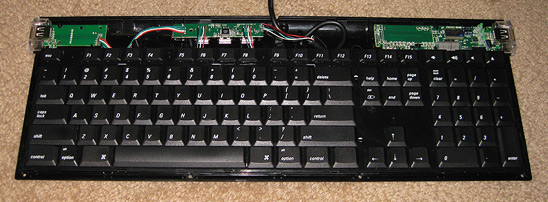
Open the Keyboard
The MacAlly IceKey is slightly trickier to get apart, but not much. Remove all the obvious screws on the bottom of the keyboard, including the one under the “Do Not Remove”/Quality Control/Warranty sticker. Then, flip open the pivoting feet to expose two more screws covered by a protective piece of rubber. The final two screws are under the front rubber feet.
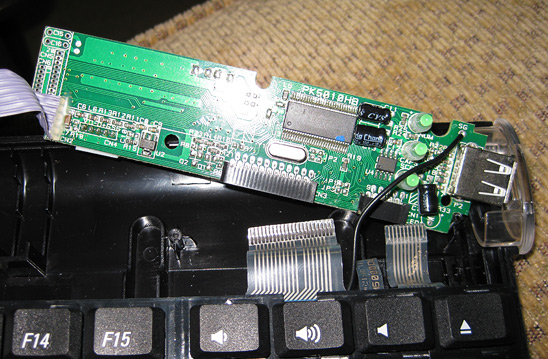
Starting with the keyboard upright and facing you, begin unsnapping the plastic hooks around the perimeter starting at the front middle. A plastic pry tool might come in handy, but isn’t required. Once the top is removed, you can clearly see all the important electronics, including a very common Cypress USB controller chip.
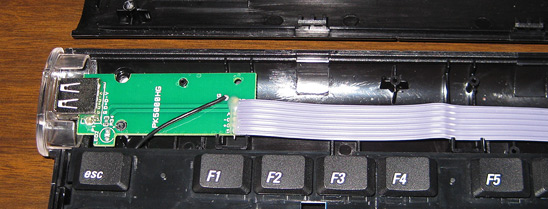
Test Fit Everything
Just to make sure the rest of this modification is physically possible, fit the USB hub board in the open space at the top of the keyboard and set the keyboard bezel on top. Luckily, the IceKey has plenty of room to spare. I was planning to have to remove the USB ports from the hub board to make everything fit, but there was so much extra space that I didn’t even have to go to that length.
Unhook the Keyboard
Carefully pull the keyboard ribbon cables straight away from their matching plugs on the controller board. Gently flip the keyboard pad over, and unscrew the two short ground wires to completely free the keyboard keys from the plastic housing. Set it aside for later; it does not need to be modified – all the action happens on the two remaining circuit boards. Unscrew both boards to get at the backs of each.
Cut Wires
Cut the gray ribbon that leads from the controller board to the left port. Since that wire only provides USB 1.1 speed, we won’t be using it. You’ll note that it has two extra wires that run to an unpopulated LED on the left board, so we can skip those when doing the re-wiring. (I wonder what MacAlly had in store for that, or if this keyboard is a “port” from another language or something?)
Unplug the USB cord from the controller board and cut off the connector. This cord needs to run to the input on the new USB hub, and not to the input on the keyboard controller board where it currently connects.
Cut Traces
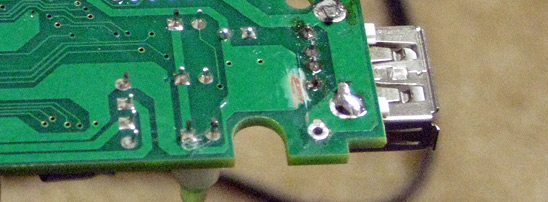
Since the right port also needs USB 2.0 speeds, it too will need to be disconnected from its USB 1.1 source. However, it is soldered directly onto the controller board and is effectively hard-wired into the slowness. This is perhaps the trickiest part of the whole project: desolder the USB connector and use a knife to scrape away the traces that run to the port. Some are on top of the board, and some are on the bottom. (You might be able to get away with cutting the traces without removing the port, as a little bit of the traces are exposed on the top before routing into electronic components, but you’ll want to test with a multimeter and make sure you’ve done this successfully.) Once all four traces to the port are cut, re-solder the USB port in place (if you removed it).
Re-wire the Keyboard Controller and Ports
Here’s a simple before and after block diagram to help your wiring layout:
Solder Keyboard Cord to Hub Input
Strip about an inch of plastic from the cut end of the keyboard cord to expose its individual wires, and strip just a millimeter or two from each of those. Using your note from earlier, solder the keyboard wires to the matching USB hub input connections. On this Targus hub, the wires were in the same order as the standard USB pinout.
Solder Keyboard Controller to a Hub Port
Solder four wires from the keyboard input port (where the cord originally connected to) to one of the USB hub ports, effectively making the keyboard controller into one of four devices on the hub. Previously, the keyboard supplied its own hub, but we’re bypassing it altogether. Luckily, most everything is either color coded or silkscreen labeled on the circuit boards (V/5V is red, D- is green, D+ is white, and G/GND is black).
Solder Keyboard USB Ports to Hub Ports
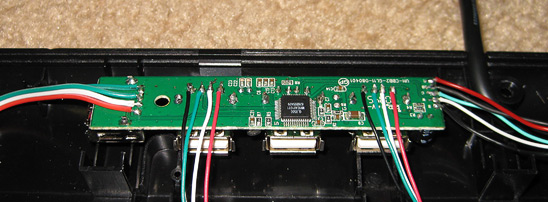
Solder wire from the left USB port board to another free USB hub port, making sure to get the order correct. With the traces cut on the right port, run wire from the connections under the board to yet another free hub port. You should end up with a hub layout like this:
Test and Close It Up
With each new component wired up, double-check your connections and plug it in. Initially, my first test failed and Windows complained about a malfunctioning USB device (I tested it on an old PC, just in case I shorted out the computer’s USB controller. I’d rather fry an old computer than my new iMac!) The key to making everything work properly was to reconnect those two shared ground wires from early on – the keyboard must have a common ground with the controller and hub!
Once it works, secure all the wires and boards. I used a few short pieces of electrical tape to stop everything from bouncing around, too. Snap the plastic top back on, replace all the screws, and enjoy your USB 2.0 MacAlly IceKey!