Things have been a little slow around here because I’ve been dedicating a bunch of time to my latest project – disassembling a grape iMac and fitting its parts into an LC III case. I’m finally done now and am happy to report that it was a complete success. It required more hardware modification than I had initially anticipated, and I ran into some problems along the way, but without those troubles I wouldn’t have made it to this point. What follows is a step-by-step of what I did to cram a big gumdrop shaped iMac into a pizza box sized LC III case.
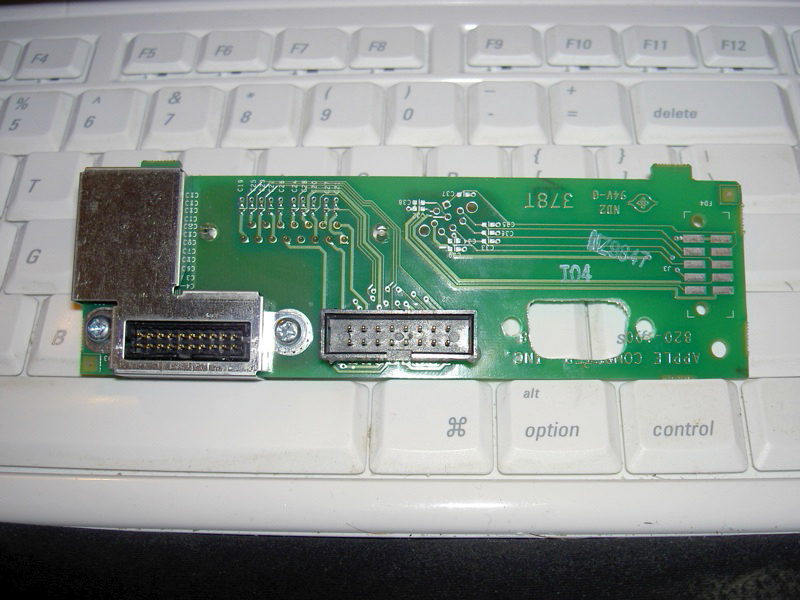
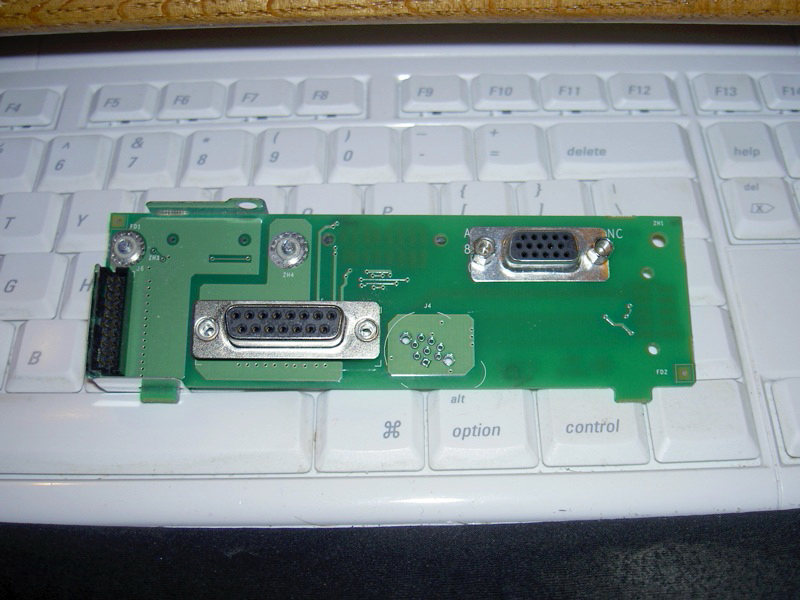
Several weeks ago I received a dead grape iMac from a MUG member who suspected that the power supply had bitten the dust. I had previously agreed that I would take the iMac in trade for retrieving the files off of the hard drive…which was a fairly easy task thanks to an IDE-to-FireWire bridge out of a hard drive enclosure. Since the power supply was useless, I couldn’t easily tell what else on the iMac worked. I disassembled the candy colored machine and salvaged the logic board, video board, speakers, microphone board, hard drive, and case. With all the major useful components laid out, I set to doing a little research on the net.
I found several useful iMac hack pages, including one (saved copy) which detailed the power connector on the bottom of the iMac’s logic board. Attached to the board is a power filter, likely because the power supply is very close to the (electrically) noisy cathode ray tube inside the iMac case. Since I wouldn’t be using the same physical configuration, it most likely wasn’t necessary.
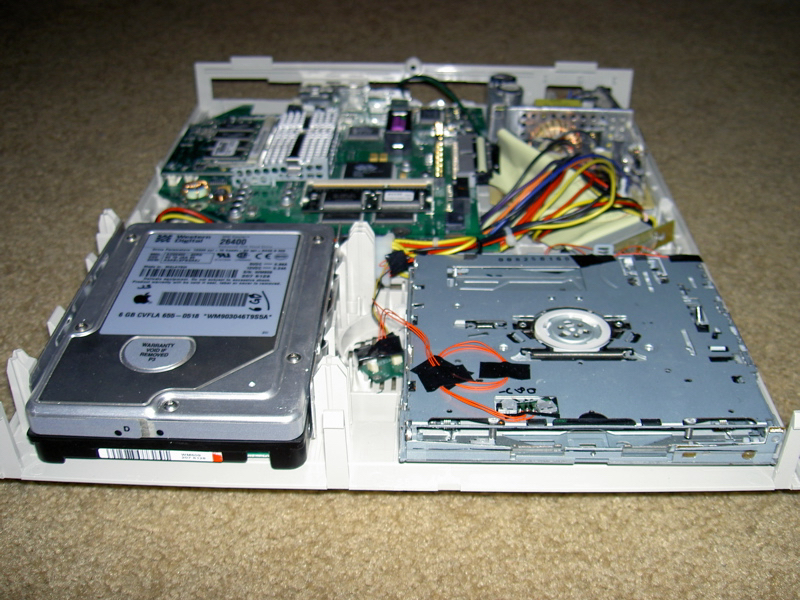
Digging around in my array of old computers, I found a Macintosh LC III which no longer worked. I decided to challenge myself and see if I could fit the iMac’s components into it. The LC III is a dream to take apart compared to the iMac – the back of the case has one screw, then two snaps. The top then easily lifts off to reveal all the parts. Since the LC III was already defunct, I just removed all the parts from the case and set them aside.
I began placing the iMac’s components into the LC III case to get a general idea of where they might fit. As far as I could tell, all the parts would fit within the area of the case, but height was another issue. The case only provides a little over an inch of vertical space, so I had to keep everything very low profile.
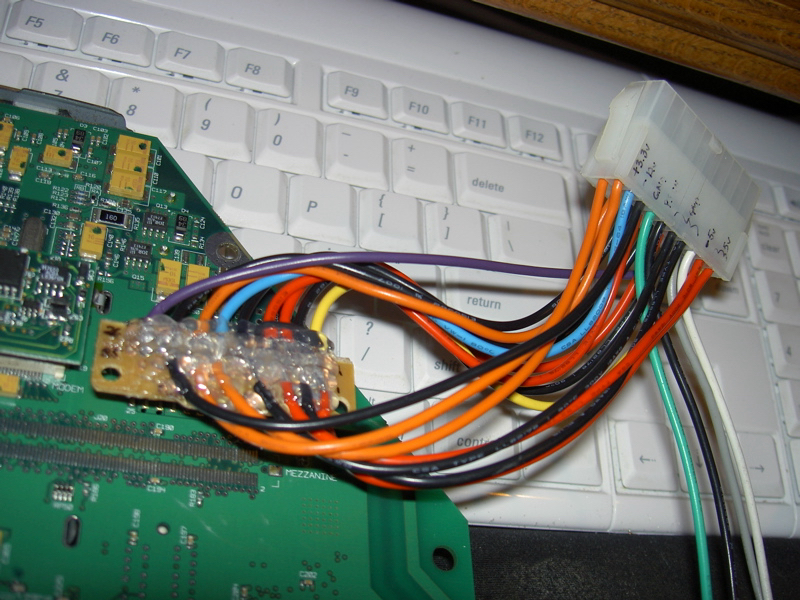
The first issue I ran into was power. Since the iMac’s power supply was dead, I couldn’t use it’s board, not to mention the fact that it was gigantic and would take up far too much space. On the iMac to ATX conversion page I found earlier, the author detailed how to adapt a standard PC ATX power supply to an iMac. Following his diagrams, I built a small adapter with a female plug and pin header, which would connect an ATX power supply to the bottom of the iMac’s logic board. With the adapter built, I carefully checked my connections – you only get one shot with this type of work. Borrowing a spare ATX power supply, I powered up the iMac logic board. While it had no magnetic or optical drives connected, it still made the familiar Mac startup chime and displayed a blinking question mark, indicating it could not find a system folder to use. I’d never been so happy to see that symbol before. I quickly powered it down and attached the iMac’s CD-ROM and let it start Mac OS X 10.3.5, which also booted just as easily.
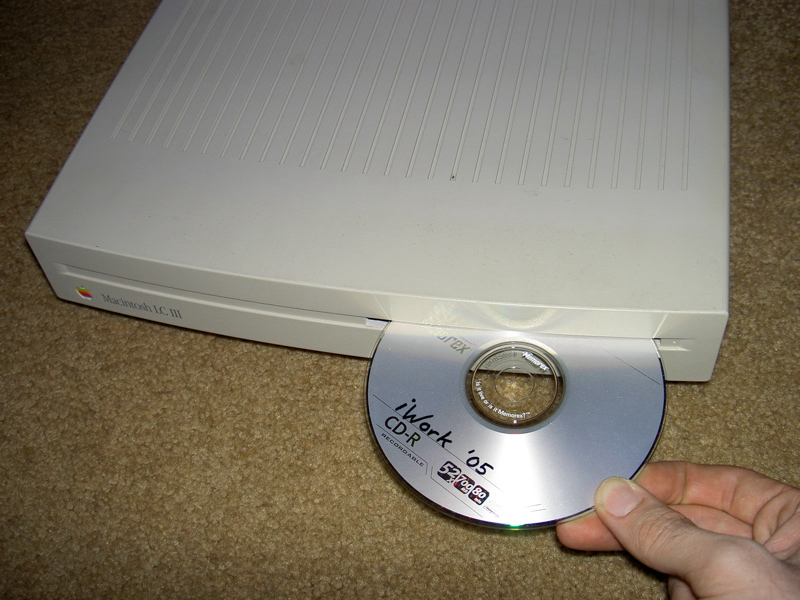
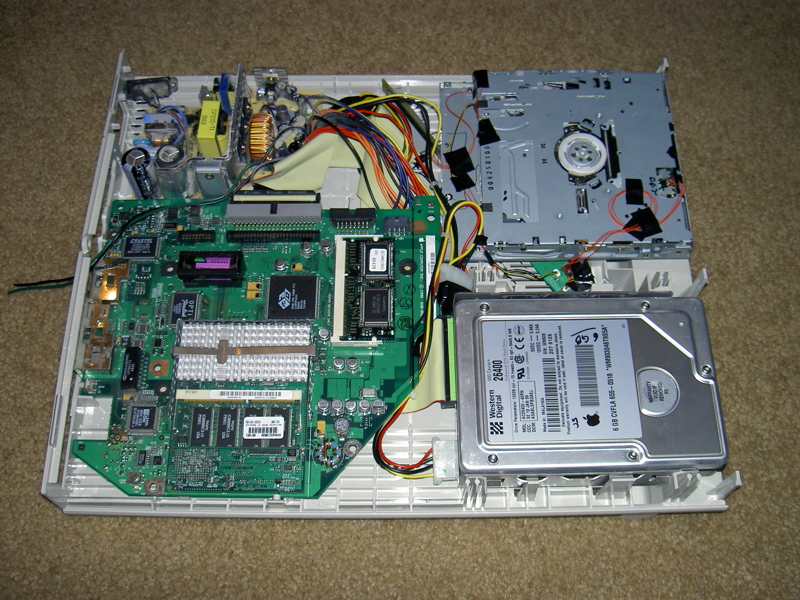
After having complete success with the logic board and power supply, I moved on to the optical drive with a good feeling that I may actually accomplish something with this project. I noticed that the LC III had a lot of spare room around the floppy drive, and I thought it would be a perfect spot for a CD drive. However, the slot facing the front wasn’t wide enough for a CD. With a little filing and sanding, the slot was wide enough to accept any disc, and has the benefit of still looking stock to the untrained eye. After that, I spent the next few hours modifying a slot-loading DVD-ROM so that it sat at the proper height to catch an inserted CD or DVD. The hard drive would stay in the same cradle as it was in the original LC III design, and required no modification to make it fit.
The biggest task in this project was to clear out most of the raised plastic squares on the bottom of the LC III case to gain an extra quarter of an inch under the motherboard and power supply. Between Dremel grinding wheels, pliers, and some sandpaper, I was able to knock out enough plastic to allow the IDE cable to sit comfortably against the bottom of the case without raising the motherboard any higher. The power supply was another issue – I scavenged a small 120 Watt ATX power supply from an old PC tower and carefully stripped it of its protective metal housing. With the small height gain, the power supply just barely fit inside the case and pressed snug against the imac logic board, holding everything in place. It wasn’t perfect, but it would do.
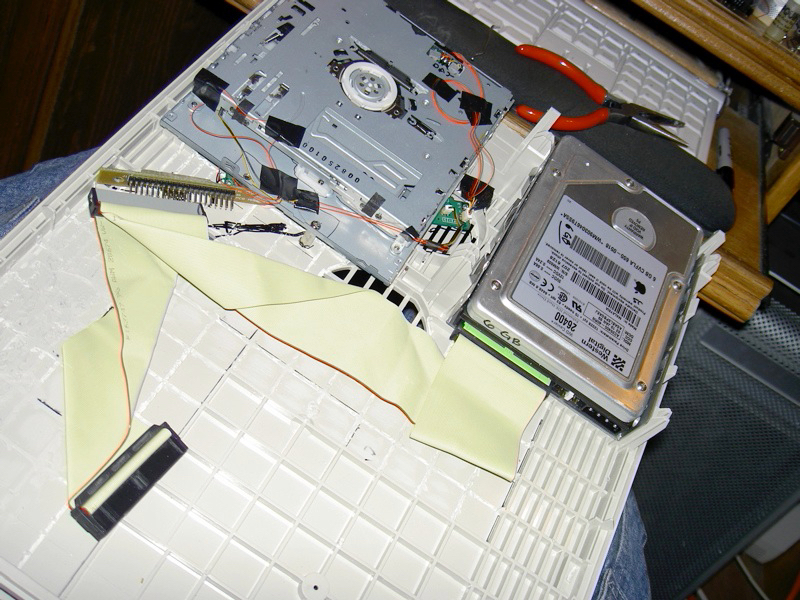
A final problem I ran into was that the connector on the back of the slot-loading DVD-ROM was on the opposite side of most laptop drives, meaning that my IDE adapter board would stick way too far outside the case. This problem had me stumped for a long while, but I eventually came up with a hack to make it work. I cut a hole in the bottom of the DVD-ROM and moved the main controller board under the drive, and ran the ribbon cable to it. This way, I could turn the board 45 degrees and make use of the IDE adapter, although at an awkward angle. Doing this modification also required that I re-run some motor control and switch wires on the drive.
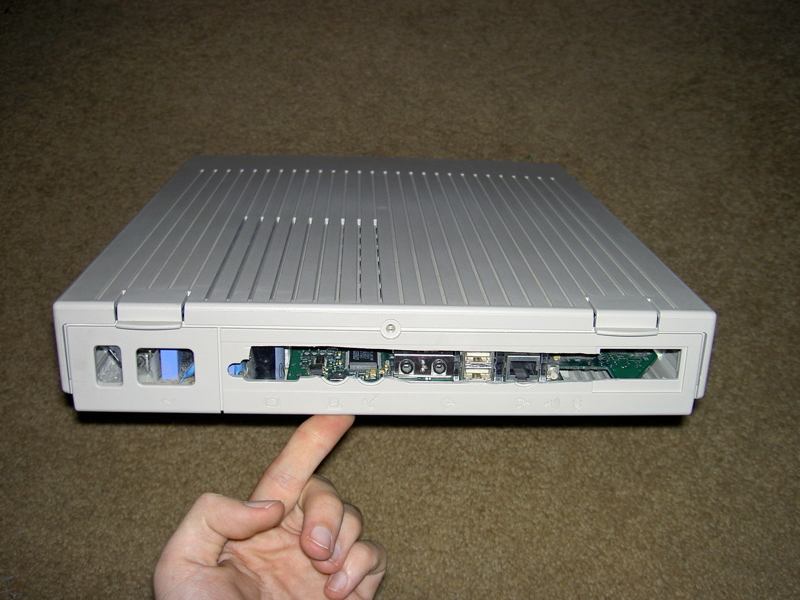
Finally, with all the major modifications complete, I carefully fitted all the components into the case, ran power and data wires to the drives, and attached the audio and video cables. While all my hacks had worked throguhout the process, I still half-expected the whole mess to go up in smoke when I powered it up. Yet, when I flipped the switch, the machine slowly came alive. With some final modifications to add a small processor fan and proper AC connector, my iMac LC III is now happily running Mac OS X 10.3.9.