iPod Super
Ultimately, I’d like to get a regular 3.5” hard drive working with an iPod. The fact that it would be huge will simply be a novelty.

Why do this?
This project came about after I dropped my 40 GB 3rd generation iPod and killed the hard drive in it. I decided to open up the iPod and see what I could do with it. I could do so without fear of breaking it, since I’d already broken the most expensive part in it.
Disassembling the iPod
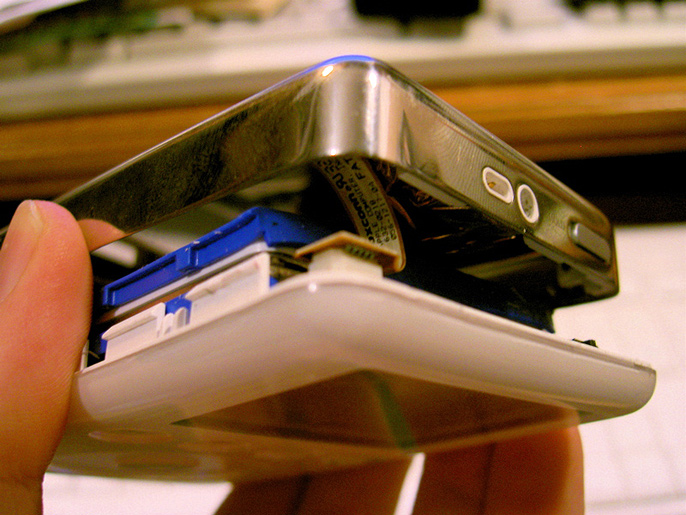
It’s not terribly hard to open the iPod if you know how. Since I had owned my iPod for some time, it had a little wear, and the seam where plastic and metal meet was open just enough to push my fingernail into. Sliding it down, I was able to stick in a nylon pry tool like the ones from RadTech. After getting the tool in there, you can pop the plastic catches and the top comes loose. OWC suggests squeezing the two halves of the iPod together at the side edge until it clicks. It looks a little scary to me, but I’ve never tried their method. I’m sure it’s perfectly valid, too. After that, detach the small white connector opposite the hold switch, and the two iPod halves separate. After moving all the loose items like the hard drive out of the way, they all disconnect without much of a problem – just be careful with those thin ribbon cables. Work slowly and don’t force things to come apart. If something’s resisting, it’s most likely because there’s a catch or screw that you overlooked.
Hard Drive Connections
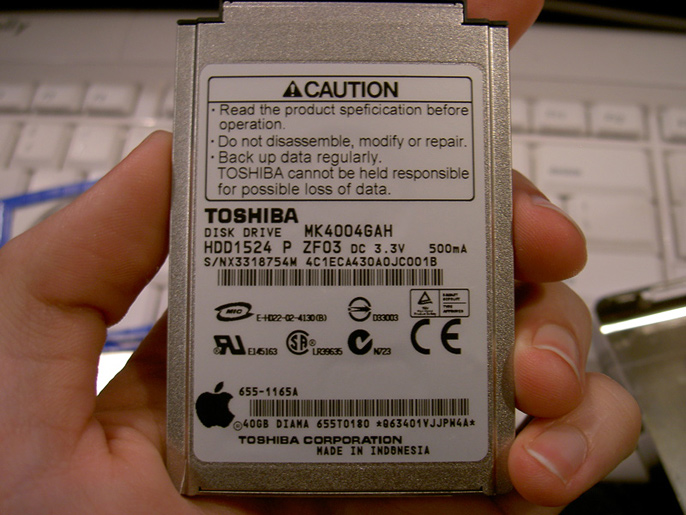
After opening the iPod, I took a look at the hard drive that no longer worked. I had a 40GB Toshiba MK4004GAH. I looked up the drive on Toshiba’s site and found a pin diagram of the connector. The top-right pin in the following image is pin 1, and below it is pin 2 – the pattern continues in an up-and-down fashion. I remembered reading somewhere that 1.8” hard drives used an ATA interface, but I wanted to confirm this. Another search yielded a diagram of a standard ATA/IDE connector. Except for four pins dedicated to logic and power, the two diagrams had the same connections.

Building the Adapter
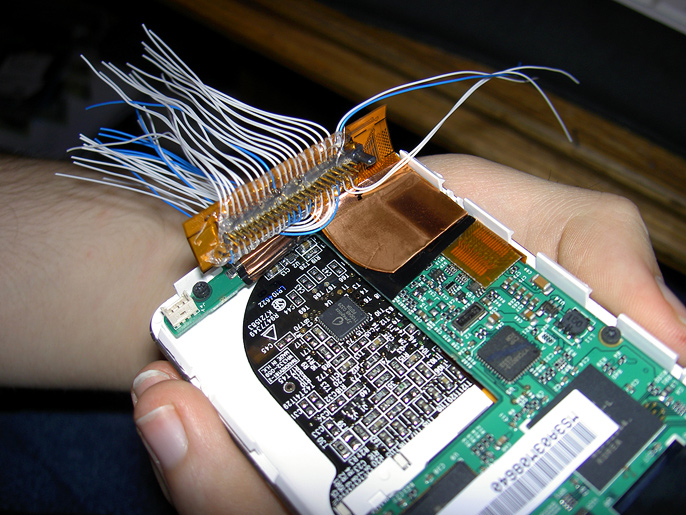
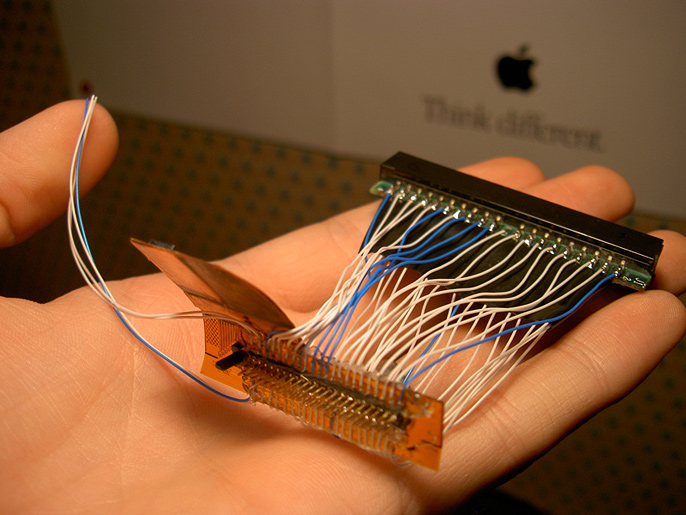
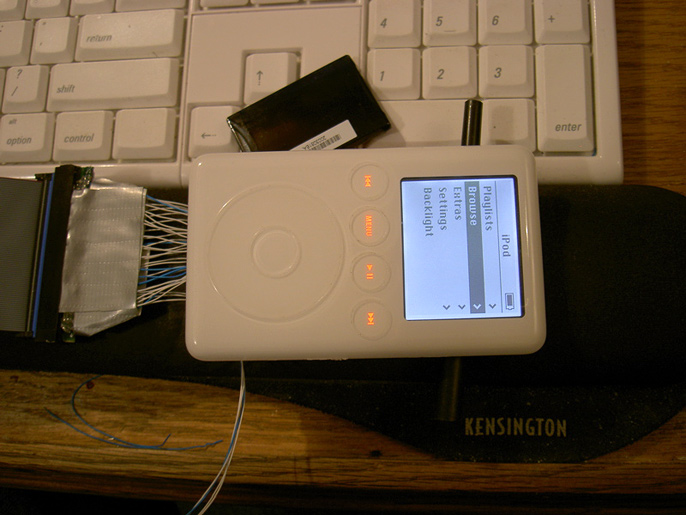
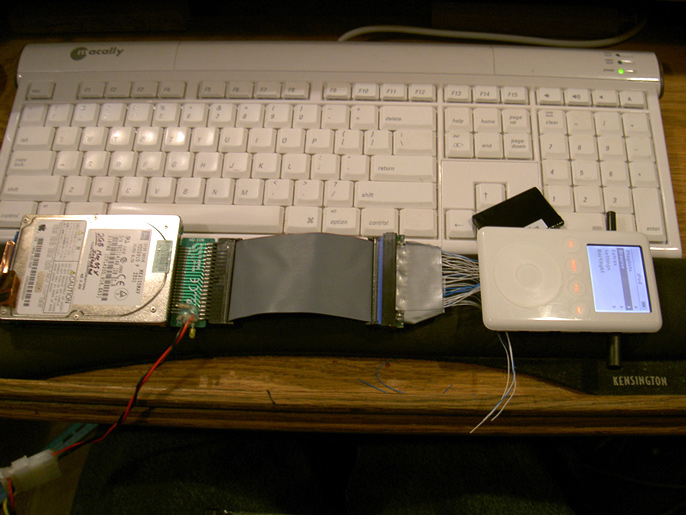
Now that I knew the hardware would match up fairly well, I needed a way for the iPod to connect to a bigger drive. A post on the ipodhacks.com forums revealed a foreign company that sold an adapter similar to what I needed, but I couldn’t read German to figure out the site, much less order from them. Examining the ribbon cable that connects the 1.8” hard drive to the iPod, I saw that there was an open area at each pin where it connected to the actual pins that went into the hard drive. I spent the next several minutes cutting and stripping rather thin 30 gauge wrapping wire. I was going to simply solder wires onto each of those points and run them to a regular IDE connector. With the wire cut, I decided I should look into finding the other end of the connector before I began the tedious soldering task ahead of me.
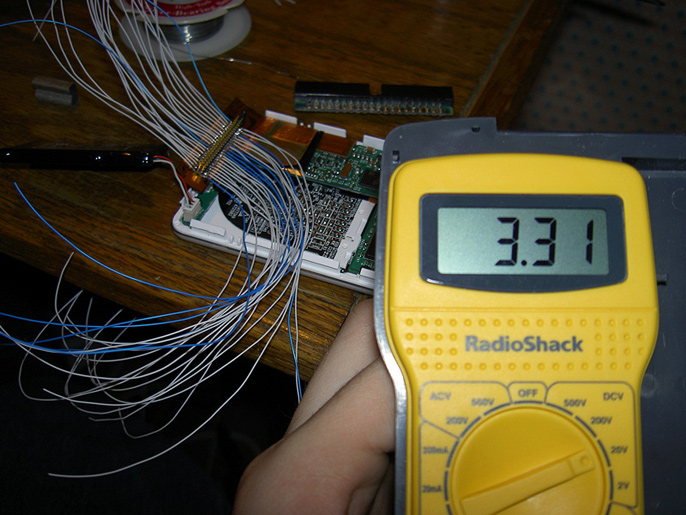
It didn’t take long to dig up an old dead hard drive whose S.M.A.R.T. status indicated it was ready to go belly-up. I unscrewed the Torx screws on the drive’s circuit board and separated it from the metal housing. Desoldering all 44 pins would be a chore, so I took the easier route and just ripped through the circuit board with a Dremel. I also considered using an IDC connector from an IDE ribbon cable, but I figured that a female IDE connector would allow me more options when it came time to attach the iPod to other devices – I could use an IDE cable and run it to a hard drive, instead of requiring that two parts sit so close together. The next step was to spend some time soldering all 44 tiny wires and testing the connections with a continuity tester. A bead of hot glue was added to hold the wires more securely, and it was finished. Though not part of my plan, this adapter can also connect an iPod hard drive to an IDE bus if necessary.
Preparing the Hard Drive
At this point I read up on how the iPod’s hard drive is formatted. There are basically three partitions: the partition map, a 32 MB firmware partition, and the rest of the disk is where your music is kept. However, the first two aren’t normally visible. Even Disk Utility will only show you the third partition. I found a lot of good info on this page, including this explanation of the partitions:
1: The first partition of the hard drive (partition no. 1 above) is necessary to make the hard drive mountable, it contains the partition map for the disk. It’s size is 63-1 = 62 in blocks which equals 32 KB. This partition is known as ‘master boot record’.
2: The second partition ‘firmware’ from block 63 to 65599, 65536 blocks in total (equals exactly 32 MB), holds the firmware of your iPod. The type is ‘Apple_MDFW’.
3: Finally, the partition ‘disk’ is of type ‘Apple_HFS’ and is keeping the data on your iPod. The size of the last partition is [number of blocks] - [base of partition ‘disk’] which is 4.74 GB of the iPod used in this example.
Formatting the New Disk
Using the information about pdisk and dd on the page mentioned above, I was able to format a 3.5” drive as the iPod would expect to see it.
Update: Here are some iPod articles from Apple that might be of use: